# 10.7 自绘组件: DoneWidget
上一节中我们通过 CustomCheckbox 演示了如何通过自定义 RenderObject 的方式来进行UI绘制、动画调度和事件处理。本节再通过一个实例来巩固换一下。
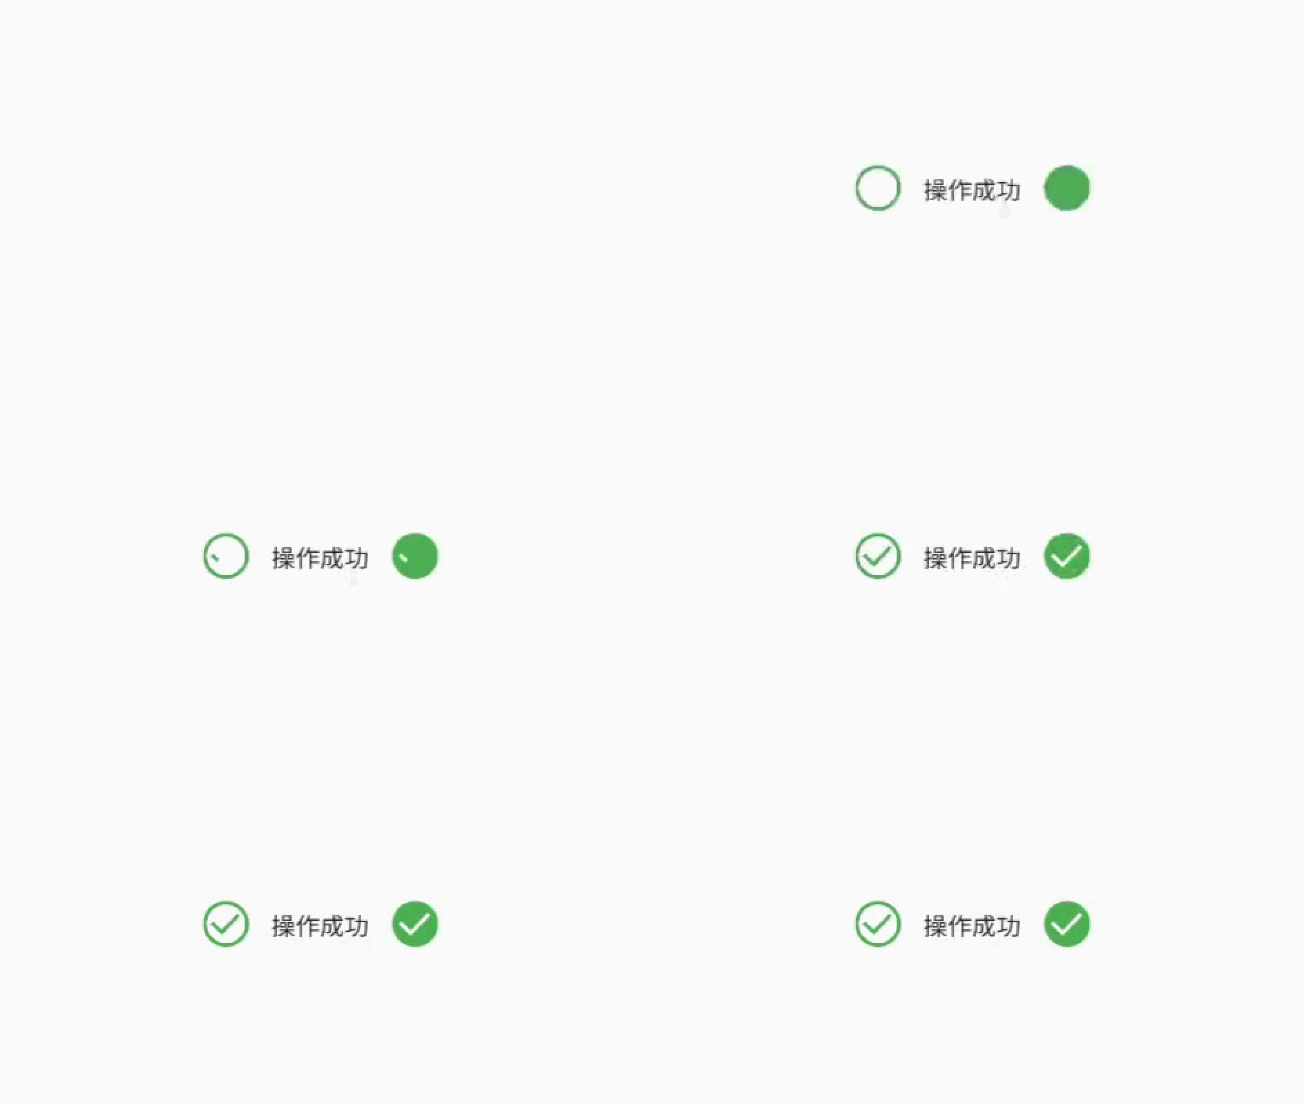
本节的我们将实现一个 DoneWidget,它可以在创建时执行一个打勾动画,效果如图10-8:

实现代码如下:
class DoneWidget extends LeafRenderObjectWidget {
const DoneWidget({
Key? key,
this.strokeWidth = 2.0,
this.color = Colors.green,
this.outline = false,
}) : super(key: key);
//线条宽度
final double strokeWidth;
//轮廓颜色或填充色
final Color color;
//如果为true,则没有填充色,color代表轮廓的颜色;如果为false,则color为填充色
final bool outline;
RenderObject createRenderObject(BuildContext context) {
return RenderDoneObject(
strokeWidth,
color,
outline,
)..animationStatus = AnimationStatus.forward; // 创建时执行正向动画
}
void updateRenderObject(context, RenderDoneObject renderObject) {
renderObject
..strokeWidth = strokeWidth
..outline = outline
..color = color;
}
}
1
2
3
4
5
6
7
8
9
10
11
12
13
14
15
16
17
18
19
20
21
22
23
24
25
26
27
28
29
30
31
32
2
3
4
5
6
7
8
9
10
11
12
13
14
15
16
17
18
19
20
21
22
23
24
25
26
27
28
29
30
31
32
DoneWidget 有两种模式,一种是 outline 模式,该模式背景没有填充色,此时 color 表示的是轮廓线条的颜色;如果是非 outline 模式,则 color 表示填充的背景色,此时 “勾” 的颜色简单设置为白色。
接下来需要实现 RenderDoneObject,由于组件不需要响应事件,所以我们可以不用添加事件相关的处理代码;但是组件需要执行动画,因此我们可以直接使用上一节中封装的 RenderObjectAnimationMixin,具体实现代码如下:
class RenderDoneObject extends RenderBox with RenderObjectAnimationMixin {
double strokeWidth;
Color color;
bool outline;
ValueChanged<bool>? onChanged;
RenderDoneObject(
this.strokeWidth,
this.color,
this.outline,
);
// 动画执行时间为 300ms
Duration get duration => const Duration(milliseconds: 300);
void doPaint(PaintingContext context, Offset offset) {
// 可以对动画运用曲线
Curve curve = Curves.easeIn;
final _progress = curve.transform(progress);
Rect rect = offset & size;
final paint = Paint()
..isAntiAlias = true
..style = outline ? PaintingStyle.stroke : PaintingStyle.fill //填充
..color = color;
if (outline) {
paint.strokeWidth = strokeWidth;
rect = rect.deflate(strokeWidth / 2);
}
// 画背景圆
context.canvas.drawCircle(rect.center, rect.shortestSide / 2, paint);
paint
..style = PaintingStyle.stroke
..color = outline ? color : Colors.white
..strokeWidth = strokeWidth;
final path = Path();
Offset firstOffset =
Offset(rect.left + rect.width / 6, rect.top + rect.height / 2.1);
final secondOffset = Offset(
rect.left + rect.width / 2.5,
rect.bottom - rect.height / 3.3,
);
path.moveTo(firstOffset.dx, firstOffset.dy);
const adjustProgress = .6;
//画 "勾"
if (_progress < adjustProgress) {
//第一个点到第二个点的连线做动画(第二个点不停的变)
Offset _secondOffset = Offset.lerp(
firstOffset,
secondOffset,
_progress / adjustProgress,
)!;
path.lineTo(_secondOffset.dx, _secondOffset.dy);
} else {
//链接第一个点和第二个点
path.lineTo(secondOffset.dx, secondOffset.dy);
//第三个点位置随着动画变,做动画
final lastOffset = Offset(
rect.right - rect.width / 5,
rect.top + rect.height / 3.5,
);
Offset _lastOffset = Offset.lerp(
secondOffset,
lastOffset,
(progress - adjustProgress) / (1 - adjustProgress),
)!;
path.lineTo(_lastOffset.dx, _lastOffset.dy);
}
context.canvas.drawPath(path, paint..style = PaintingStyle.stroke);
}
void performLayout() {
// 如果父组件指定了固定宽高,则使用父组件指定的,否则宽高默认置为 25
size = constraints.constrain(
constraints.isTight ? Size.infinite : const Size(25, 25),
);
}
}
1
2
3
4
5
6
7
8
9
10
11
12
13
14
15
16
17
18
19
20
21
22
23
24
25
26
27
28
29
30
31
32
33
34
35
36
37
38
39
40
41
42
43
44
45
46
47
48
49
50
51
52
53
54
55
56
57
58
59
60
61
62
63
64
65
66
67
68
69
70
71
72
73
74
75
76
77
78
79
80
81
82
83
84
85
86
87
88
89
90
2
3
4
5
6
7
8
9
10
11
12
13
14
15
16
17
18
19
20
21
22
23
24
25
26
27
28
29
30
31
32
33
34
35
36
37
38
39
40
41
42
43
44
45
46
47
48
49
50
51
52
53
54
55
56
57
58
59
60
61
62
63
64
65
66
67
68
69
70
71
72
73
74
75
76
77
78
79
80
81
82
83
84
85
86
87
88
89
90
上面代码很简单,但需要注意三点:
- 我们对动画应用了easeIn 曲线,可以看到如果在 RenderObject 中对动画应用曲线,另外读者应该也能发现,曲线的本质就是对动画的进度加了一层映射,通过不同的映射规则就可以控制动画在不同阶段的快慢。
- 我们重写了 RenderObjectAnimationMixin 中的 duration,该参数用于指定动画时长。
- adjustProgress 的作用主要是将“打勾”动画氛围两部分,第一部分是第一个点和第二个点的连线动画,这部分动画站总动画时长的 前 60%; 第二部分是第二点和第三个点的连线动画,该部分动画占总时长的后 40%。

请作者喝杯咖啡
版权所有,禁止私自转发、克隆网站。
